7 Boxing Footwork Drills That Instantly Improve Movement in 2026 (In-depth Guides)
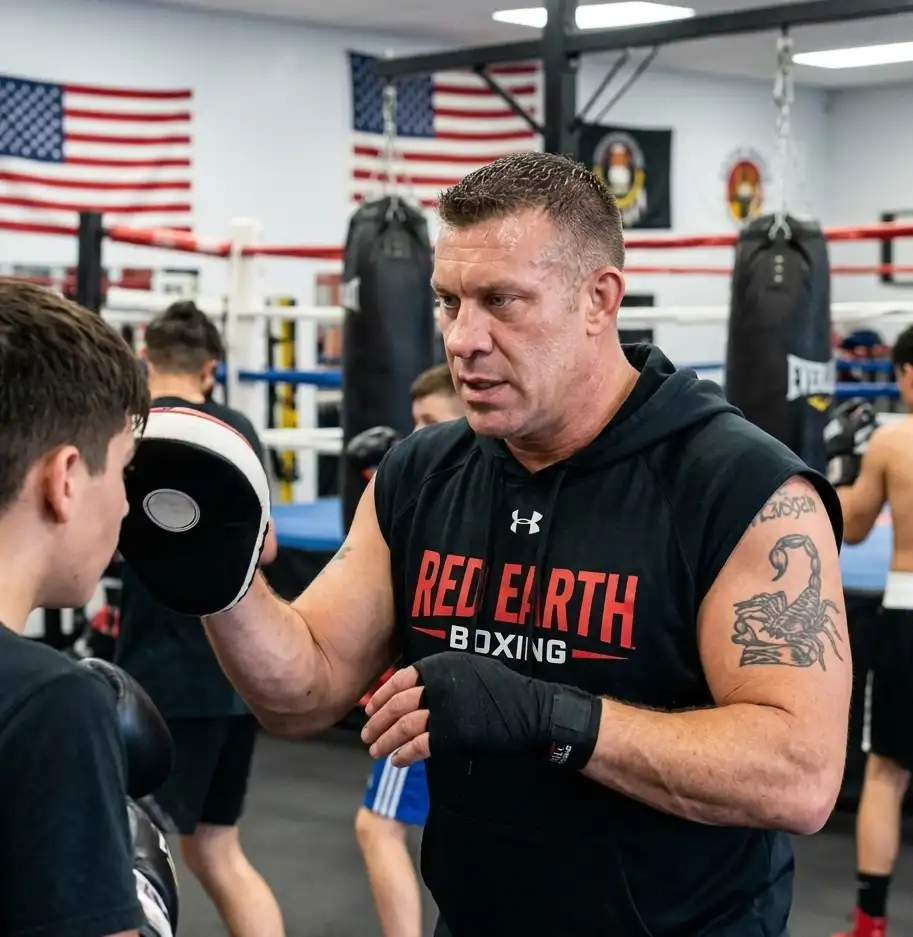
Most beginners look fine on the heavy bag until someone throws a jab back at them. You can usually tell who only trains on heavy bags because they freeze once movement starts. They throw great combinations in the air, but the second they have to step off the center line, their feet get tangled.
Footwork isn’t about fancy dances or agility ladders. It’s about balance, distance, and not getting hit. When a new boxer steps into the gym, the first thing a coach notices isn’t their punch speed. It’s how they walk to the bag. If they drag their feet or cross their legs while walking, they are going to struggle in the ring.
This guide breaks down seven practical footwork drills we actually use on the gym floor. No complicated science, just the basic movements that stop you from falling over when you try to slip a punch.
How do I fix bad boxing footwork? Quick Answer
Stop crossing your feet and stop jumping. Stick to the basic step-drag, keep your stance width consistent, and practice moving before you throw punches. The three most important drills for beginners are the basic step-drag, the wall shadow drill for distance management, and the rope-line drill to maintain your base when you get tired.
The Reality of Beginner Footwork
If you stand by the ring during open sparring, you’ll notice a pattern. The experienced fighters barely seem to move their feet, yet they are always at the perfect distance. The beginners are constantly lunging, reaching, and stumbling.
Beginners almost always cross their feet once pressure starts. They panic, try to retreat quickly, and end up stepping their lead foot behind their rear foot. The moment that happens, they have zero balance. A light push to the chest would knock them over.
People usually stop moving their feet the moment they get tired. Round one looks great. By round three, they are flat-footed, leaning forward, and trying to reach with their punches instead of stepping in. Good footwork isn’t about moving fast; it’s about moving efficiently so you don’t gas out.
Visual Recommendation: A side-by-side comparison graphic. Left: “Beginner Stance” showing feet close together and leaning forward. Right: “Proper Base” showing shoulder-width apart, knees slightly bent, weight centered.
Beginner Footwork Checklist
Before you start drilling, run through this quick mental checklist. If you are failing these, the drills won’t help you yet.
- Are your feet shoulder-width apart? Too narrow, and you’ll tip over. Too wide, and you can’t move.
- Is your weight on the balls of your feet? Your heels should lightly touch the canvas, but your weight is forward.
- Are your knees slightly bent? Locked knees mean you can’t explode or absorb impact.
- Is your chin tucked? Footwork doesn’t matter if your posture is broken.
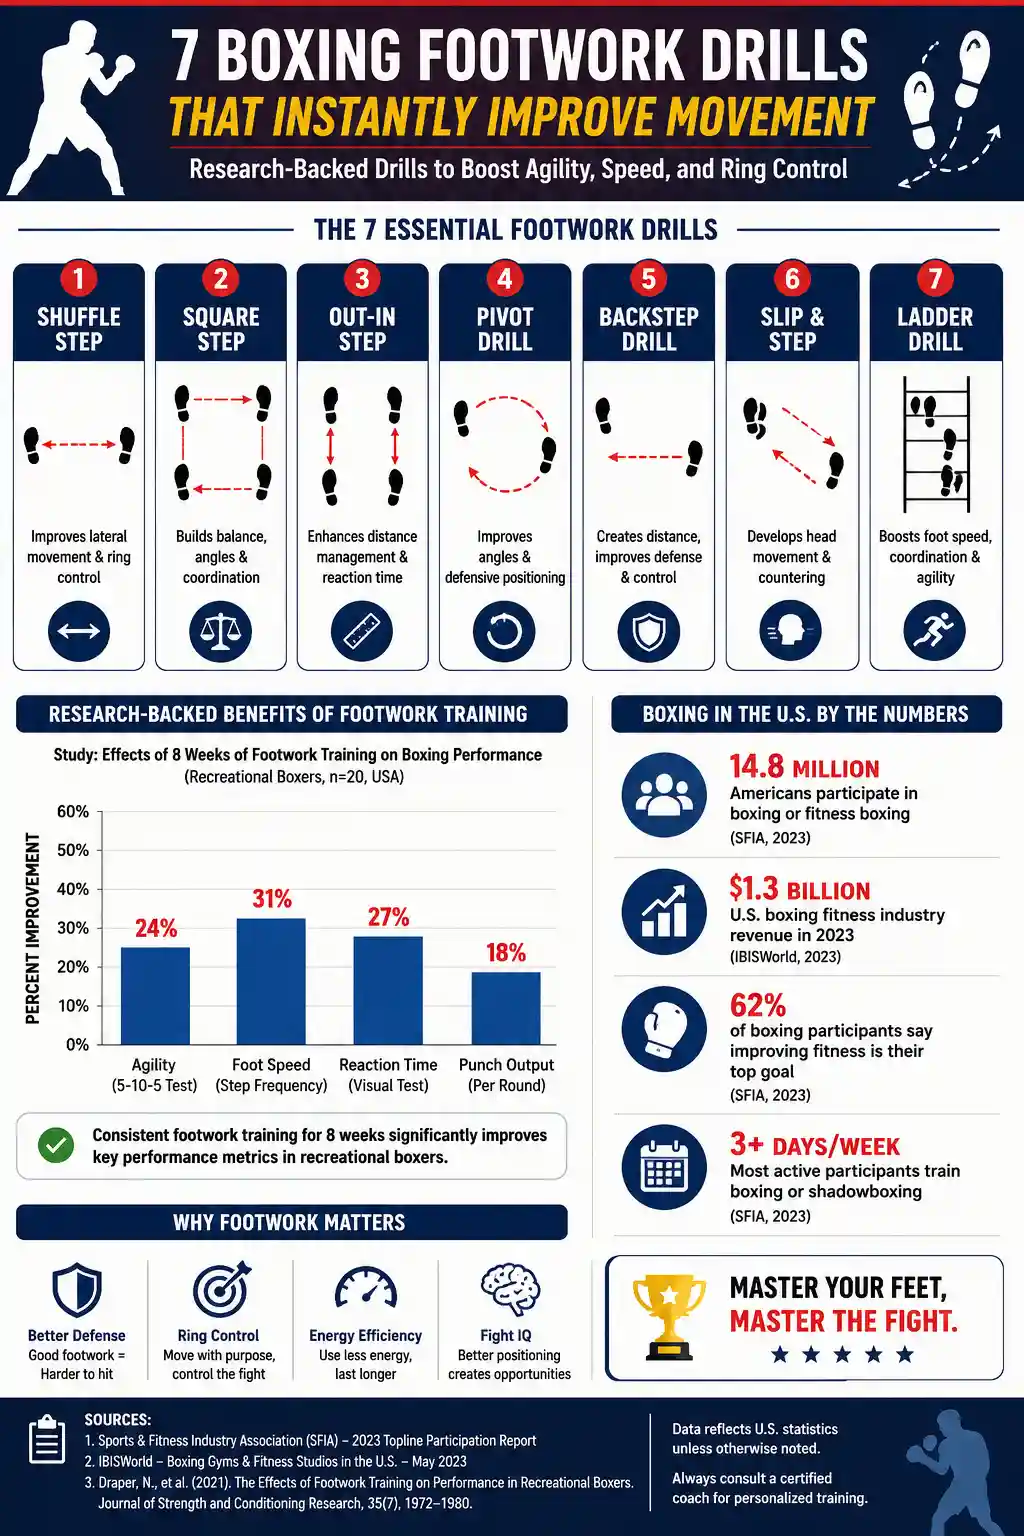
7 Footwork Drills That Instantly Improve Movement
1. The Basic Step-Drag (The Foundation)
This is the first thing you learn, and it’s the thing you’ll use the most. It’s simple, but beginners constantly mess it up by bringing their feet together.
The Setup: Get in your boxing stance, facing a mirror or a heavy bag.
The Execution: To move forward, step with your lead foot first, then drag your rear foot up to re-establish your stance width. To move backward, step with your rear foot first, then drag the lead foot back. To move left, step lead, drag rear. To move right, step rear, drag lead.
What Coaches Notice: Beginners tend to “click” their heels together after every step. They step forward, bring the back foot all the way up until it touches the front foot, and then take another step. This leaves you completely off balance in the middle of the movement. Keep the space between your feet constant.
Visual Recommendation: Top-down diagram showing footwork arrows. A “Do” graphic showing a constant 12-inch gap between feet. A “Don’t” graphic showing feet touching together mid-step.
2. The Pendulum Step (Rhythm and Bounce)
You see this a lot in amateur fights. It’s that rhythmic bouncing back and forth. It keeps your calves engaged and makes you work harder for a time.
The Setup: Stay in your stance. Keep your hands high.
The Execution: Shift your weight slightly forward onto the lead leg, then push off and shift backward onto the rear leg. It’s a small, controlled bounce. You aren’t jumping into the air; you are just shifting your center of gravity back and forth.
What Coaches Notice: New boxers almost always jump too high. They bounce like they are on a trampoline. This wastes massive amounts of energy. By the end of a two-minute round, their legs are dead. Keep the bounce under two inches off the floor.
3. The 90-Degree Pivot (Creating Angles)
When someone rushes you straight forward, you don’t want to just back up. You want to step off the track. That’s what the pivot is for.
The Setup: Stand in your stance. Imagine a nail driven through the ball of your lead foot into the floor.
The Execution: Keep your lead foot planted. Push off your rear foot and swing your back leg 90 degrees to the left (for orthodox fighters). You should now be facing the side of your opponent, and they should be punching the air where you just were.
What Coaches Notice: Beginners try to spin on two feet at the same time. They cross their legs, trip over their own heels, and end up facing the corner turnbuckle. The plant that leads the foot. It is your anchor.
Visual Recommendation: A circular graphic showing a lead foot planted as a pivot point, with an arrow sweeping the rear foot 90 degrees to create a new angle.
4. The Wall Shadow Drill (Distance Management)
Most beginners have terrible spatial awareness. They don’t know where they are in the ring until they bump into the ropes.
The Setup: Stand in your stance facing a wall. Extend your lead arm (your jab) so your glove just barely touches the drywall.
The Execution: Start shadowboxing. Move left, right, forward, and backward. Your goal is to keep that exact same distance from the wall at all times without looking at it. Use your peripheral vision.
What Coaches Notice: People drift forward without realizing it. They throw a one-two combination, lean into the punch, and suddenly their glove is smashing against the wall. This drill forces you to maintain your range and step back after you finish your combinations.
5. The L-Drill (Cutting Off the Ring)
Beginners follow their opponents in circles. If the opponent moves left, the beginner steps left. You end up chasing them all night.
The Setup: Put a cone (or a water bottle) in the center of the room. Imagine it’s your opponent.
The Execution: As the “opponent” moves laterally, you don’t follow them directly. You move at an angle to cut them off. Step diagonally to intercept their path. You want to force them into a corner or the ropes.
What Coaches Notice: Beginners get frustrated when the “opponent” keeps escaping. They start lunging and reaching to try to grab them. Good ring generalship is about taking away space, not reaching for it.
6. The Rope-Line Walk (Stance Integrity)
This is a fatigue drill. Everyone has good footwork in the first thirty seconds. Very few people have it in the last thirty seconds.
The Setup: Put a piece of tape or a jump rope in a straight line on the floor.
The Execution: Straddle the line. Your lead foot is on one side, your rear foot is on the other. Move up and down the line using your step-drag. Do this for a full three-minute round.
What Coaches Notice: As fatigue sets in, the stance narrows. The fighter gets tired, their legs shake, and they slowly bring their feet closer together until they are standing like they are waiting for a bus. The rope forces you to maintain your base even when your calves are burning.
Visual Recommendation: A floor-level photo showing a piece of athletic tape on a boxing mat, with a fighter’s feet straddling the tape to demonstrate proper shoulder-width base.
7. The Slip-and-Step Drill (Defense into Movement)
Beginners slip well on the mitts, but in sparring, they slip and just stand there admiring their defense. You have to move after you slip.
The Setup: Shadowbox at a slow pace.
The Execution: Throw a jab. Imagine a jab coming back at you. Slip to the outside (right), and immediately take a step to the right. Throw a hook from the new angle.
What Coaches Notice: Beginners slip, return their head to the center line, and then try to move. That’s too late. The slip and the step must happen together. You slip to a new position, not just away from a punch.
Common Mistakes Coaches See Every Day
If you spend enough time watching beginners spar, you see the same four mistakes every single night.
| The Mistake | Why It Happens | The Fix |
|---|---|---|
| Crossing the Feet | Panicking and trying to back up too fast. | Step with your rear foot first. Never let your heels pass each other. |
| Walking Instead of Stepping | Picking the feet up too high off the canvas. | Keep your soles an inch off the floor. Glide, don’t march. |
| Leaning Forward | Wanting to hit the bag harder or reach the target. | Push off the back foot. Your nose should never pass your lead knee. |
| Stopping to Punch | Lack of coordination between the upper and lower body. | Plant your feet to punch, but move immediately after the combo ends. |
You can hear panic breathing before you see defensive mistakes. When a beginner gets trapped on the ropes, they hold their breath, cross their feet, and just start swinging. Slow down. Breathe. Step-drag out of the corner.
Equipment You Actually Need
You don’t need expensive gadgets to fix your feet. You just need the right basics.
Boxing Shoes (or Wrestling Shoes): This is non-negotiable for serious training. Running shoes have thick, squishy heels. If you try to pivot or move laterally in running shoes, the thick foam will catch the canvas, and you will roll your ankle. Boxing shoes have flat, thin soles that let you feel the floor.
A Full-Length Mirror: You cannot feel what you look like. You have to see it. Shadowboxing in front of a mirror is the fastest way to catch yourself crossing your feet or dropping your hands when you step.
Athletic Tape or Chalk: Use this to mark lines on your garage or basement floor for the rope-line drill.
A Jump Rope: Not for footwork drills directly, but for conditioning the calves and Achilles tendons to handle the constant micro-movements of boxing.
Visual Recommendation: An image comparing the thick, curved heel of a running shoe next to the flat, thin, gum-rubber sole of a traditional boxing shoe.
Safety & Conditioning
Boxing conditioning is explosive and stop-start, not steady-state. If you go from sitting at a desk all day to doing three minutes of constant pendulum bouncing, your body will rebel.
Calf and Achilles Strains: This is the most common lower-body injury for beginners. You aren’t used to staying on the balls of your feet. Combat sports conditioning tends to work better with explosive interval rounds than long steady-state cardio. Do your footwork drills in short bursts (30 seconds on, 30 seconds off) to build the specific endurance needed for the ring.
Ring Toes: Stubbing your toes on the canvas seams or the ring ropes is incredibly common. Keep your toenails trimmed short, and ensure your boxing shoes fit snugly so your foot doesn’t slide forward inside the shoe when you stop suddenly.
USA Boxing strongly recommends a thorough dynamic warm-up before footwork drills. Do ankle circles, calf raises, and light jogging to get the synovial fluid moving in your joints before you start pivoting.
Gym-Specific FAQs
Why do my calves cramp after just one round of shadowboxing?
Because you are probably jumping, not stepping. Beginners tense up their legs and bounce aggressively, which floods the calves with lactic acid. Relax your legs. The pendulum step should be a smooth weight transfer, not a vertical jump. Also, you likely need to stretch your calves more outside of the gym.
Should I always be bouncing in my stance?
No. The “pendulum” bounce is great for the outside range when you are trying to gauge distance or stay loose. But when you get into the pocket (close range) to throw hooks and uppercuts, you need to be flat-footed and grounded to generate power and absorb body shots. If you are bouncing while throwing a liver shot, you are doing it wrong.
How long until footwork feels natural?
Most beginners need a few months before movement starts feeling natural. In the first four weeks, you will have to consciously think about every single step. “Step lead, drag rear. Don’t cross.” It feels robotic. Around month three, your brain stops micromanaging your feet, and you start moving on reaction. Stick with it.
I look great on the heavy bag, but I freeze in sparring. Why?
The heavy bag doesn’t hit back. When you hit the bag, you control the distance. In sparring, the distance is constantly changing because the other person is moving. You are freezing because your brain is overwhelmed by the visual stimuli. The fix is to slow down. Do light, technical sparring where the goal is just to touch shoulders, not to land hard punches. Get used to the movement first.
Can I practice these drills barefoot?
You can, and it’s actually great for strengthening the small stabilizing muscles in your feet and ankles. However, gym floors are dirty and full of splinters or stray tape. If you are at home on a clean mat, barefoot is fine. If you are in a public boxing gym, wear your shoes to prevent staph infections and floor burns.
Final Thoughts
Good footwork is boring. It doesn’t look cool on Instagram, and it doesn’t make a loud cracking sound like a heavy bag hook. But it is the only thing keeping you from getting knocked off balance.
Stop worrying about throwing six-punch combinations if you can’t step backward without crossing your feet. Spend ten minutes before every workout just doing the basic step-drag and the rope-line drill. Watch your feet in the mirror. Correct the mistakes when you are fresh, so you don’t repeat them when you are tired and someone is trying to take your head off.
Keep your base wide, keep your weight centered, and remember to move your feet before you move your hands.