How to Wrap Your Hands for Boxing Properly (2026 Guide)
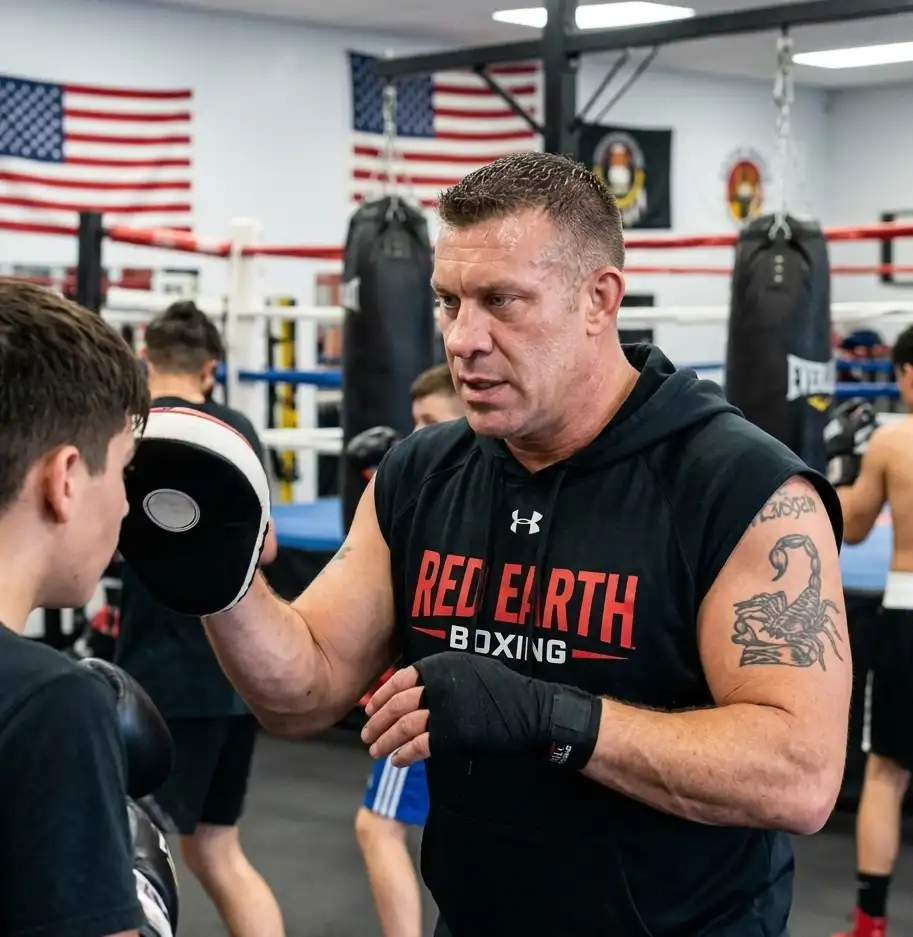
I spend a lot of time standing near the locker room benches before evening classes. You learn a lot about a boxer by how they handle their hand wraps before training even starts.
You can usually spot the beginners by how they approach the bench. Some treat it like a suggestion, wrapping their hands like they are securing a loose tent flap. Others pull the cotton so tight their fingers turn purple before the bell even rings. And then there are the guys who take fifteen minutes to wrap, holding up the entire class while the coach waits by the heavy bags.
Hand wrapping is not a pre-fight ritual. It is structural engineering for your skeleton. Your hand is a bundle of 27 small, fragile bones. When you punch a heavy bag or a sparring partner, the impact wants to scatter those bones. A proper wrap keeps them compressed into a single, solid block. It also splints your wrist so it doesn’t bend backward when you land a cross off-balance.
This guide skips the textbook anatomy lessons and focuses on what actually happens in the gym. Here is how to wrap your hands so you can train hard, avoid the injury ward, and stop adjusting your gloves between rounds.
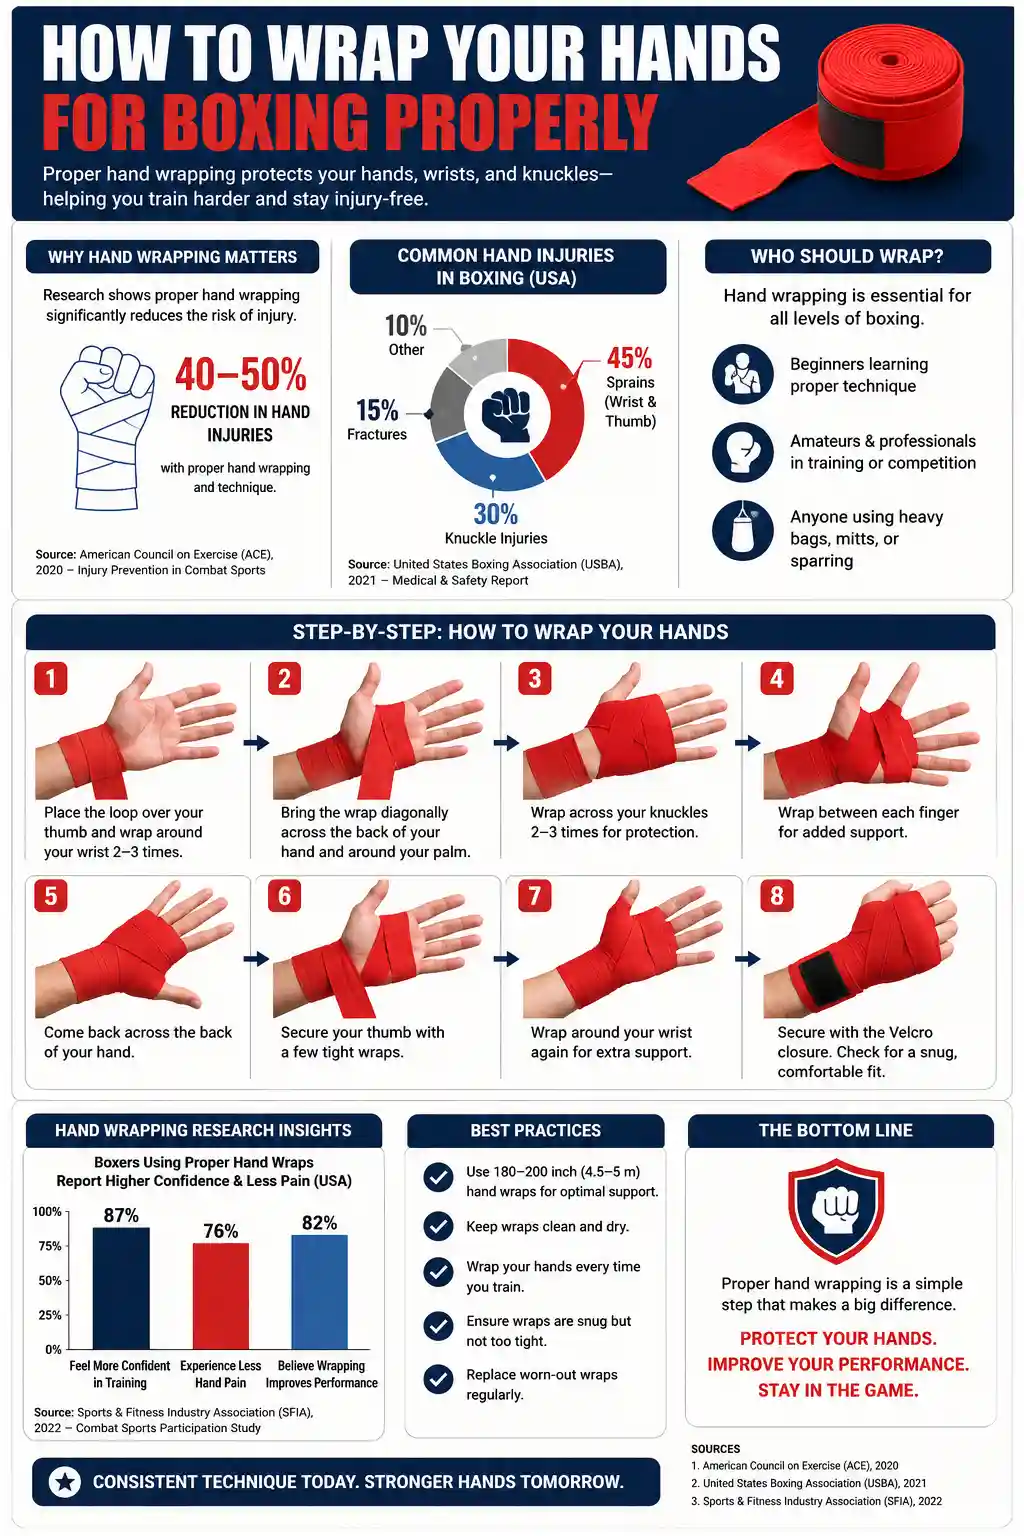
Quick Answer: The 5-Step Wrap Sequence
- Anchor: Loop the thumb hole, wrap across the back of the hand.
- Wrist Stack: Wrap the wrist joint 3 times to create a splint.
- The X (Figure-Eight): Cross the palm, go around the thumb, and back to the wrist to support the thumb base.
- Knuckle Bed: Wrap across the knuckles 3 times to pad the metacarpals.
- Finish: Secure the Velcro at the wrist. Make a fist to check tension.
Educational Disclaimer: Boxing involves repetitive high-impact force. Hand wraps reduce the risk of fractures and sprains, but they do not make you invincible. If you feel sharp pain in your wrist, knuckles, or thumb while punching, stop immediately and consult a sports medicine professional or your coach. USA Boxing guidelines strongly recommend proper hand protection for all impact training.
Why Most Beginners Get Hand Wraps Wrong
Most beginners think hand wraps are just there to keep their boxing gloves from smelling bad. They treat the wrap like a sweatband.
You can usually tell who only trains on the heavy bag because their wraps start unraveling the second they have to clinch or block a hook. Heavy bags don’t fight back. They don’t grab your wrists, and they don’t force you to tighten your fist defensively in a split second.
When beginners step onto the mitts or into the sparring ring, their bad wrapping habits show up immediately.
The Heavy Bag Wrap: Wrapped too loosely. The moment they throw a 1-2-3 combination and tighten their fist, the wrap shifts. By round two, the knuckles are bare inside the glove, and the wrist support is sitting halfway down their forearm.
The Panic Wrap: Wrapped too tight. Beginners often hold their breath without realizing it while wrapping. They pull the cotton with maximum tension, cutting off circulation. Twenty minutes into class, they are shaking out numb hands and blaming the gym temperature.
The Thumb Trap: Wrapped over the thumb joint. When they make a fist, the wrap pulls the thumb backward, causing joint pain before they even throw a punch.
A good wrap should feel like a firm handshake. It should support the structure of your hand without stopping the blood flow. You should be able to open your hand completely flat, and then make a tight fist without feeling like your hand is in a vice grip.
The Equipment: What You Actually Need
Walk into any sporting goods store, and you will see a wall of hand wraps. They all look similar, but they perform very differently once you start sweating.
Length: 180-inch vs. 120-inch
Most adult boxers need 180-inch wraps.
Beginners often buy 120-inch wraps because they look easier to manage. Unless you have very small hands or are wrapping a child’s hands, 120 inches is not enough material to properly stack the wrist, cross the thumb, and pad the knuckles. You end up rushing the finish, leaving your wrist exposed.
Material: Mexican Style (Semi-Elastic) vs. 100% Cotton
This is a debate you will hear in every gym.
| Wrap Type | Pros | Cons | Best For |
|---|---|---|---|
| Mexican Style (Semi-Elastic) | Moves with your hand. Stays tight when you make a fist and relax. | It can lose elasticity over time. Snags easily on Velcro. | Almost everyone. Mitt work, sparring, heavy bag. |
| 100% Cotton (Non-Elastic) | Very durable. Doesn’t stretch out after months of use. | Can feel restrictive. If you wrap too tightly, it won’t give when your hand swells during training. | Heavy bag hitters, fighters with wrist injuries needing rigid support. |
For 90% of beginners, the 180-inch Mexican-style semi-elastic wrap is the correct choice. It forgives minor wrapping mistakes because the material stretches slightly when you make a fist.
Step-by-Step Wrapping Technique
Find a bench. Unroll the wrap completely so it isn’t tangled. Keep your hand relaxed, fingers slightly spread. Do not make a fist while you are wrapping.
Step 1: The Thumb Anchor
Put the loop over your thumb.
Pay attention to the direction of the roll. The wrap should roll under your hand and across the back of your palm, not over the top of your hand.
Why? If the wrap rolls over the top, the heavy seam of the cotton will rub against your skin every time you make a fist. By round four, that friction will cause a blister. Keep the flat side of the wrap against your skin.
Step 2: The Wrist Stack
Bring the wrap down to your wrist joint. Wrap around the wrist exactly three times.
Keep your hand perfectly straight. Do not bend your wrist up or down while doing this. If you wrap your wrist while it is bent, the cotton will lock into that bent position. The second you straighten your arm to throw a jab, the wrap will loosen and slide down your forearm.
The tension here should be snug. This is the foundation of your punch.
Step 3: The Diagonal and The Thumb Loop
Pull the wrap diagonally across the back of your hand, over your index finger, and down across your palm.
Loop it around the base of your thumb.
Coach’s Observation: Do not wrap the thumb joint itself. You only want to anchor the base of the thumb where it meets the palm. This prevents the thumb from jamming backward when you throw a hook or miss a punch and hit the heavy bag awkwardly.
Step 4: The Figure-Eight (The X)
From the thumb, bring the wrap back down across your palm to the opposite side of your wrist. Wrap around the wrist once.
You have now created an “X” across the back of your hand and palm. This figure-eight pattern is what connects your wrist support to your thumb support. It locks the carpal bones in place.
Step 5: The Knuckle Bed
Bring the wrap up to your knuckles. Wrap across the knuckles three times.
Keep the wrap flat. Do not let it twist into a rope. A twisted wrap creates a pressure point on your knuckles that will bruise the bone underneath.
This section pads the metacarpals. It also fills the extra space inside the glove so your hand doesn’t slide around when you sweat.
Step 6: The Finish
Use whatever material is left to wrap down to the wrist and secure the Velcro.
The Velcro must close on the wrist, not on the back of the hand or the knuckles. If the hard plastic edge of the Velcro sits on your knuckles, it will dig into your skin inside the glove. If it sits on the wrist, it acts as one final layer of support.
Beginner Checklist Before You Put Your Gloves On
Before you walk over to the coach and ask for mitts, run through this quick physical check. It takes five seconds and saves you from unwrapping and starting over.
The Flat Hand Test: Open your hand completely. Does the wrap feel like it is cutting off circulation at the webbing of your fingers? If yes, it is too tight.
The First Test: Make a tight fist. Does the wrap restrict your knuckles from closing fully? You should feel compression, not a roadblock.
The Thumb Test: Touch your thumb to your pinky finger. Can you do this without the wrap pulling your thumb joint backward?
The Wrist Test: Bend your wrist up and down. The wrap should feel like a stiff brace that limits extreme bending, but allows basic movement.
The Velcro Check: Is the Velcro fully secured at the wrist? Are there any loose flaps that will scratch your sparring partner?
Common Hand Wrapping Mistakes
Coaches notice these mistakes from across the gym. Fix them before your coach has to yell across the room.
1. The Tourniquet Wrap
Beginners often pull the cotton with all their strength. They think tighter equals safer. It doesn’t. Cutting off the blood supply to your hand means your muscles will fatigue twice as fast. Your hand will cramp during heavy bag work, and you will start dropping your guard because your forearm is burning.
2. Biting the Velcro
Never use your teeth to hold the wrap while you adjust the tension, and never use your teeth to rip the Velcro open when taking them off. It destroys the material, and frankly, it is a hygiene issue. No one wants to share focus mitts with someone who chews on their sweaty gear.
3. The Forearm Mummy
Some beginners run out of wrap or get confused and just start wrapping their forearms. The forearm does not need wrapping. The impact happens at the knuckles and the wrist joint. Keep the material where the bones actually take the shock.
4. Washing Them Wrong (Or Not At All)
Hand wraps absorb sweat, dead skin, and gym bacteria. If you throw them in your gym bag wet, they will develop a permanent, sour vinegar smell within a week.
The Fix: Unroll them completely after every class. Hang them over a chair or a drying rack. Wash them in a mesh laundry bag in the washing machine once a week. Never put them in the dryer; the heat destroys the semi-elastic spandex fibers, turning your Mexican-style wraps into useless, wavy cotton ribbons.
Safety & Wrist Alignment
A hand wrap cannot fix bad punching technique.
Most beginners square up once the combinations speed up. They throw wide hooks and land with their wrists bent. If your wrist is bent at a 45-degree angle when your fist hits a 200-pound heavy bag, the kinetic energy has nowhere to go but directly into your carpal joints. A good wrap will buy you a fraction of a second of protection, but it will not stop a sprain if your form is fundamentally broken.
USA Boxing and most amateur organizations mandate hand wraps for a reason. The repetitive micro-trauma of hitting pads without wraps leads to stress fractures in the metacarpals. You might feel fine for the first three months. Then, one Tuesday, you throw a standard 1-2, feel a dull pop in your ring finger knuckle, and you are out of the gym for six weeks with a hairline fracture.
Think of the wrap as a cast that you put on and take off every day. It keeps the small bones stacked tightly together so the force of the punch travels up your arm, into your shoulder, and into your core, rather than shattering the fragile architecture of your hand.
FAQ: Real Questions From The Locker Room
Do I need to wear hand wraps for shadowboxing?
No. Shadowboxing is about footwork, head movement, and muscle memory. There is no impact, so there is no risk to your bones. However, some beginners wear them during shadowboxing simply to get used to the feeling of making a fist with extra bulk inside their gloves.
Can I just use those slip-on gel inner gloves?
Gel gloves are fine for a light-heavy bag session when you are in a rush. They offer decent knuckle padding. But they offer almost zero wrist support. The moment you start doing mitt work with a coach who demands high-volume combinations, your wrist will start to ache. Stick to traditional wraps for serious training.
How long should it take to wrap my hands?
When you first start, it might take three or four minutes per hand. You will fumble, drop the wrap, and wrap over the wrong side of the seam. Do not rush it. After a month of consistent training, you should be able to wrap both hands cleanly in about 90 seconds while having a conversation. If it takes you 10 minutes, you are overcomplicating it.
My wraps smell like vinegar even after washing. What do I do?
The bacteria that cause that smell get trapped deep in the cotton fibers. Add half a cup of white vinegar to the wash cycle (do not mix with bleach) to kill the bacteria, then run a normal cycle with detergent. If they still smell after that, throw them away and buy a new pair. They are cheap, and your training partners will appreciate it.
Do I wrap my left hand or right hand first?
It does not matter. Most orthodox fighters wrap their left hand first because it is their lead hand, but there is no rule. Just make sure you mirror the technique. If you wrap the wrist stack clockwise on the left hand, do it clockwise on the right hand. Consistency builds muscle memory.
About The Author
Neil Stephens is a National Academy of Sports Medicine (NASM) Certified Personal Trainer and a Certified USA Boxing Coach based in Los Angeles. With hands-on experience in boxing training, conditioning, and athletic performance, he focuses on helping readers understand practical boxing techniques, fitness strategies, and combat sports conditioning.
Neil is the author of Boxinges, also known as “Boxinges USA,” where he shares expert-backed content about boxing training, workouts, recovery, and sports performance. His content is built around accuracy, real-world coaching knowledge, and athlete-focused guidance to support beginners and experienced fighters alike.
Final Thoughts
Hand wrapping is the first drill of the day. It sets the tone for how seriously you take your training.
Take the extra sixty seconds to lay the cotton flat. Stack the wrist properly. Pad the knuckles. When you slide your hand into the glove, it should feel like an extension of your arm, not a loose tool rattling around in a box.
Protect your hands. They are the only ones you get.